
Or: How I learned to Stop Worrying and Love the OpenAI API
TLDR: I built a WordPress plugin that acts as an immediate point of contact via chatbot using OpenAI’s API, Raleway and Discord. It sets up qualifying questions and pings me on discord when someone uses the chatbot feature.
The Problem: Drop off in lead responses drop drastically after the first hour.
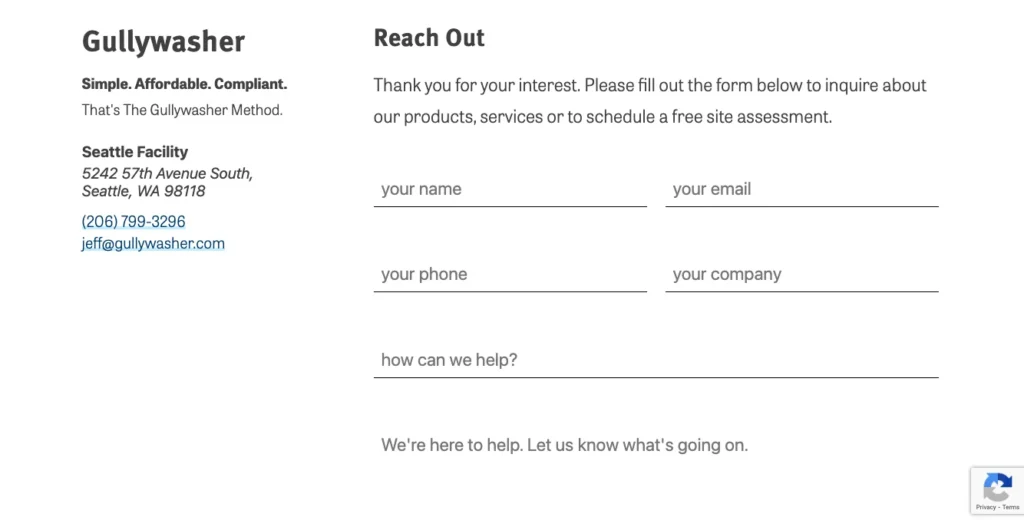
I work with B2B and Technical Service companies: architects, engineers, and manufacturers. The type of client looking at professional services or manufacturing quantities isn’t looking for the buy now button. There are technical questions to be answered and trust to be earned. So, usually the marketing mix includes SEO and search ads funneling into some sort of form.
FORMS WORK. They’re the backbone of so many marketing initiatives. Having someone fill out a form as far as I’m concerned is a win. The problem is that it’s got a half-life. If someone reaches out to you about your service, there’s a good chance they’re shopping around and if you don’t get back to them quickly that lead becomes less and less likely to convert.
I rebuilt the b2b lead nurturing system for an insulated packaging manufacturer in Los Angeles. Their leads were going cold due to slow response times—sometimes hours or days before first contact. Using automated lead response with templated emails and auto-generated drafts, we reduced lead-to-quote time from hours to under 10 minutes. I put myself in the first point of contact position for a few months. I could have the lead onto quoting within 2-3 emails with each email taking less than 5 minutes where an salesperson could pick up the rest of the processes.
Chatbots promise that immediacy on a website. But the issue is that Chatbots are ANNOYING. They’ve been around forever and they suck most of the time. The little corner bubble pops up and there is a generic, “howdy, how can I help?” It’s corny and in the past the scripting wasn’t very good.
Now with chatGPT, claude and more getting into the mix. It seems to me every one of these old services are getting a shot in the arm by bolting on AI to their products. They’re charging a premium for it. The pricing is hard to determine because they charge by features, completions and closes, but let’s say it ranges between $40-$150 per month. Feel free to look around: intercom, hubspot, voiceflow, manychat.

A lot of it feels like overkill and part of the issue, I’ve always found with this type of SAAS company is that they build an entire ecosystem that forces you to train on their system. So I thought, I need something simple and I could probably making something more geared to me with a Plugin, AI engine and Zapier. The WordPress chatbot plugin market is kind of messy and most of the time it looks like they’re going to sell you on a service. That’s the thing I’m trying to avoid. So, we’re going to build our own plugin. Something cheap, something we control, something that actually works the way we want it to.
The Stack Decision
First thought: Slack
I’ve used Slack. It’s popular. The integration seemed obvious and I wasn’t going for multiple seats, so I didn’t think much of it. I thought I’d be able to hook into the Slack with a webhook. I went through the process reading their documentation and it just didn’t work, thinngs went sideways. I’m convinced they just want you to sign up and live on their ecosystem.
Then: Discord
I’d been part of several Discord servers—some small, some huge—but I’d never actually created one. Discord is an instant messaging social platform, that allows you to communicate in text, video and voice. It’s usually geared for gaming, socializing and community building. Servers are cake to create, but the flow of information was hard for me to understand at first. Luckily both the messaging app and their developers page was easy to navigate.
Best of all, FREE, no ecosystem, none of that.
We’ll get into how to set up discord for your Lead system later, for now let’s focus on the flow.
How It Actually Works
Here’s the flow:
- Visitor lands on your site → sees chat bubble
- Clicks it → AI starts conversation
- AI qualifies them → asks about industry, project, budget, timeline
- When they’re serious → Discord thread created, you get pinged
- You reply in Discord → message appears on website in real-time
- Conversation ends → you have the full transcript in Discord
The AI isn’t following a script. It’s actually understanding what people are saying and adapting. If someone asks “Do you work with municipalities?” it doesn’t break—it responds naturally based on your company info.
The Architecture
This is where it gets interesting. The system has four main components:
┌─────────────────────┐
│  WordPress Plugin   │ ← Frontend chat + AI logic
└──────────┬──────────┘
           │
           ↓
┌─────────────────────┐
│   OpenAI API        │ ← GPT-4 generates responses
└─────────────────────┘
           │
           ↓
┌─────────────────────┐
│   Discord API       │ ← Creates threads, notifications
└──────────┬──────────┘
           │
           ↓
┌─────────────────────┐
│ Railway Bot Listener│ ← Watches Discord, forwards replies
└─────────────────────┘
           │
           ↓
    Back to WordPress
WordPress Plugin
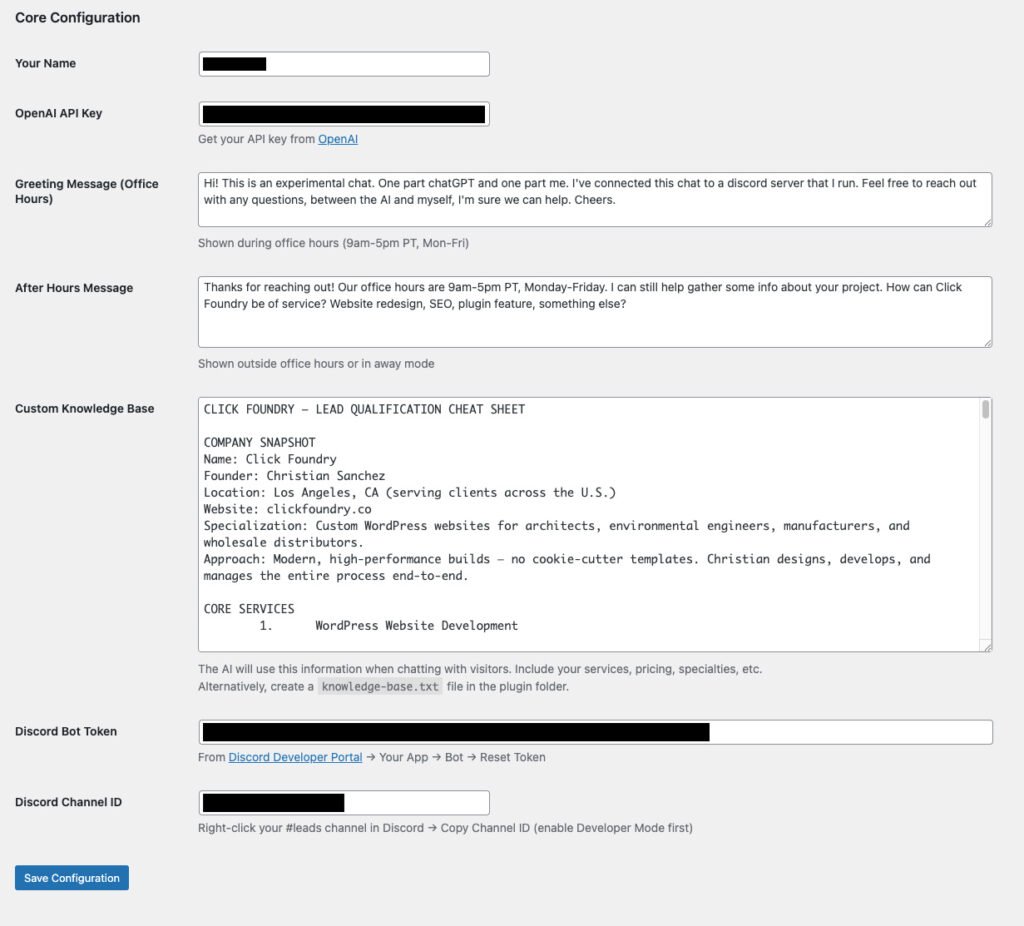
Right now, it’s 4 basic files, php to handle all the wordpress backend stuff. JS & CSS for the chatbot popup and a text file called knowledge base where you can manually add in all your information. In time, I’ll split the file up and go through the plugin directory validation process, but for now, you can go to my github and download it there.
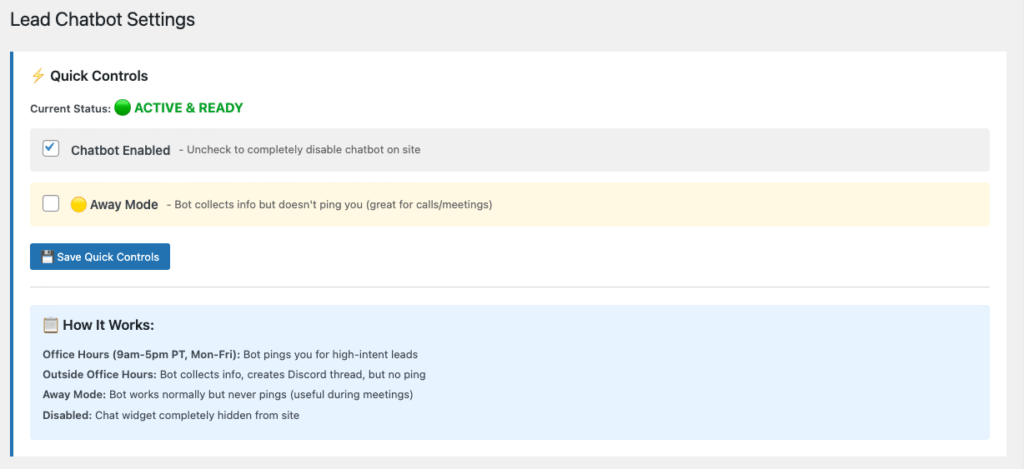
I added some things for myself, like office hours and a radio button that enables and away mode version. The idea being that if you can see me working on my site, you know I’m available for questions and the chatbot should act in a different way in either instance.
Setting up the plugin
For security purposes. I’ve left all API keys, Tokens and IDs blank in the plugin. You just have to drop them into the plugin settings. In the plugin there is a custom knowledge base text file, but you can also add instructions directly in the plugin.
Why Railway?
I’m taking it for granted you know what a WordPress plugin is and that you’re aware of ChatGPT (OpenAI) and we’ve spent some time discussing Discord. So Railway is a cloud service that allows you to run code from github and can store variables (think databases and API keys) securely.
We need Railway because Discord can’t send the messages typed in the Discord chat back to the WordPress site on its own. Railway is always running, watching discord and it then forwards the messages to WordPress.
So the flow looks like this:
WordPress (sending messages) ─────→ Discord API ─────→ Your #leads channel
                                         ↑
                                         │
                                    Bot Token
                                         │
                                         ↓
Railway Bot (listening) ←───────── Discord API ←────── Your replies in Discord
         │
         └─────→ WordPress REST API ─────→ Visitor sees your reply
How to set up Discord for your Lead System with Railway.app
Step 1: Create Your Discord Server
Your Discord server is your private workspace where all lead notifications will appear. If you already use Discord, you probably have a personal server or are part of other servers—this will be your dedicated space just for business leads.
Creating a server is free and takes about 30 seconds. Open Discord (desktop app or web) and look for the green plus icon on the left sidebar. Click it and choose “Create My Own” → “For me and my friends” (or skip the template). Name it something like “Lead Management” or “Business Workspace.”
Once created, your server will have a URL that looks like https://discord.com/channels/1234567890/. That long number is your server ID—you won’t need it directly, but it’s how Discord identifies your server.
Link: Discord Server Setup Guide
Step 2: Create Your #leads Channel and Get the Channel ID
Inside your new server, you’ll see a default “#general” channel. You want to create a dedicated channel specifically for lead notifications. Click the plus icon next to “Text Channels” in your server sidebar and name it “leads” (or “new-leads”, “inquiries”, whatever makes sense).
Now here’s the important part: you need to copy the Channel ID. Discord doesn’t show IDs by default, so first you need to enable Developer Mode. Go to User Settings (gear icon in bottom left) → Advanced → toggle on “Developer Mode.” This lets you right-click any channel, server, or user and see their ID.
Right-click your newly created #leads channel and select “Copy Channel ID.” You’ll get something like 987654321098765432. Save this somewhere—you’ll paste it into your WordPress plugin settings later.
Links:
Step 3: Create Your Bot in the Discord Developer Portal
This is where things get a bit confusing. In Discord’s world, what you think of as a “bot” is actually called an “Application” that has a “Bot User” attached to it. The Application is the container, the Bot User is what actually connects to Discord.
Head over to the Discord Developer Portal at https://discord.com/developers/applications and click the blue “New Application” button in the top right. Give it a name like “Lead Chatbot” or “Website Assistant”—this name is just for your reference and won’t be visible to site visitors.
Once created, you’ll see a dashboard with several tabs on the left. Click on “Bot” and then click “Add Bot.” This creates the actual bot user that will interact with Discord. You’ll see a token appear—this is your Bot Token, and it’s essentially the password your code uses to authenticate. Click “Reset Token” to generate a fresh one, then “Copy” to save it somewhere secure. Never share this publicly or commit it to GitHub—treat it like a password.
While you’re on the Bot page, scroll down to “Privileged Gateway Intents.” These are special permissions that bots need to request explicitly. Check the boxes for “MESSAGE CONTENT INTENT” (so the bot can read what people type) and “SERVER MEMBERS INTENT” (so the bot can see who’s in the server). Without these enabled, your bot won’t be able to read messages or create threads properly.
Link: Discord Developer Portal – Getting Started
Step 3a: Generate an Invite URL and Add Your Bot to Your Server
Now you need to actually invite the bot to your server. Go to the “OAuth2” tab in the Developer Portal, then click “URL Generator” in the submenu.
Under “Scopes,” check the box for bot. This tells Discord you’re generating a URL to invite a bot. A second section will appear below labeled “Bot Permissions.” Check these boxes:
- Send Messages
- Create Public Threads
- Send Messages in Threads
- Read Message History
These permissions let your bot create thread conversations and send notifications. Discord will generate a URL at the bottom of the page that looks like https://discord.com/api/oauth2/authorize?client_id=...&permissions=...&scope=bot.
Copy that URL, paste it into your browser, and Discord will ask which server you want to add the bot to. Select your newly created server from the dropdown and click “Authorize.” Your bot will now appear in your server’s member list (though it’ll be offline until you actually run the code).
Links:
Step 4: Add Your Credentials to WordPress
Back in your WordPress admin, go to Settings → Lead Chatbot. You’ll see fields for “Discord Bot Token” and “Discord Channel ID.” Paste in:
- The Bot Token you copied from the Developer Portal
- The Channel ID you copied from your #leads channel
Save the settings. Your WordPress plugin can now send messages to Discord.
Step 5: Deploy the Railway Bot Listener
WordPress can send messages to Discord, but it can’t receive them—Discord doesn’t have a way to push messages to WordPress automatically. So we need a small Node.js bot running 24/7 that watches Discord for your replies and forwards them back to WordPress.
Railway.app is a free hosting platform (free tier is generous enough for this) that makes deployment simple. Create an account at https://railway.app, then create a new project by clicking “New Project” → “Empty Service.”
You’ll need two files: bot.js (the code that listens to Discord) and package.json (which tells Railway what dependencies to install). Upload both files or connect a GitHub repo.
In your Railway project settings, add two environment variables:
BOT_TOKEN: Your Discord bot token (same one from WordPress)WORDPRESS_URL:https://yoursite.com/wp-json/alc/v1/discord-message
Railway will automatically detect that it’s a Node.js project, install the dependencies from package.json, and run node bot.js. You can find the bot.js file in the corresponding github repo. Within a minute or two, your bot will come online in Discord (you’ll see it change from offline to online in your server’s member list).
Links:
Verification
To test if everything’s working:
- Open your website and click the chat bubble
- Send a message like “Hi, I’m interested in your services”
- Check your Discord #leads channel—you should see a new thread created with the conversation
- Reply in that Discord thread
- Check your website—your reply should appear in the chat within 2-3 seconds
If that works, you’re live!
The Numbers Breakdown
Monthly costs:
- OpenAI API: ~$5-15/month (GPT-4o-mini, ~$0.001 per conversation)
- Railway: $0 (free tier) or $5/month
- Discord: $0
- WordPress: Already paying for hosting
Total: $5-20/month
Compare that to:
- Intercom: $74-149/month minimum
- Drift: $2,500/month (yes, really)
- HubSpot Chat: $45-800/month
And you own all of it. Your data, your transcripts, your control.
What’s Next
This is version 1.0. It works, it’s in production, and it’s free if you want the code.
But I’m working on version 2.0 with:
- Google Drive integration (OAuth-based, auto-saves transcripts)
- CRM connections (auto-create contacts in HubSpot/Pipedrive)
- Lead scoring (AI analyzes conversation quality)
- Follow-up automation (draft emails based on chat context)
- Analytics dashboard (conversion rates, common questions, time-to-response)
This is the beginning of a marketing automation workflow or at the very least proper lead system that accounts for the entire funnel. Getting someone to your site is huge. Giving them a way to interact immediately—without forcing them to fill out a form and wait—that’s the competitive advantage.
Why This Matters
Chat interfaces are becoming familiar. ChatGPT trained everyone. It doesn’t feel novel anymore, it feels familiar.
And here’s the thing: search is exploratory, chatting feels personal. When someone lands on your site wondering “Is this company right for me?”, a chat that can actually answer their questions is infinitely better than forcing them to hunt through your Services page.
You’re giving people their own personal ChatGPT that knows your business.
The SaaS companies charging $500/month are going to have a rough time when their customers realize they can build better for $10.
Want This For Your Business?
If you’re interested in bringing this to your business and pushing the product forward, reach out. I’m actively developing version 2.0 and working with a company to expand the feature set. email is chrisitian@clickfoundry.co or use the chat bot.
The current version is free. If you want the code to tinker with, check out the repo. If you want to integrate something like this into your website or workflow, again let me know via email.